
Photography Tutorial: Fashion Photography Using Textures
February 14, 2012
Posted in: Photographers Tutorial Post-Production
Hello everyone, I get a lot of emails asking about how I come to gather my ideas together for my "textured" photography, and how I put these elements into action.
This isn't going to be a huge blog explaining every single detail (I need to keep a few of my secrets). However, I am going to show is the process of beginning to end, explain a basic understanding, and show you step by step images.
To start off, I usually always have some sort of a plan going into the shoot that I am going to be creating some texture around my image. Depending on what type of texture will determine whether I need to shoot with a certain style back drop. The example that I am showing you is strictly based on my idea of having the galaxy of stars and bright lights around our subject.
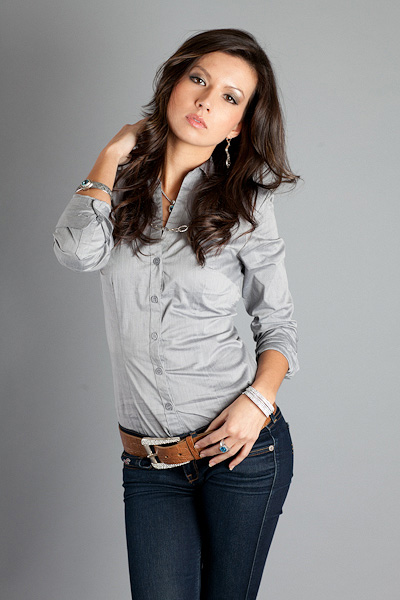
STEP ONE: The first step may seem simple enough, take the photo. For this shot, I had three lights set up. Two surrounding my subject to light the sides of her, which allowed her to appear separated from the backdrop, as the background and her shirt were both gray. I photographed her on gray because I knew the texture needed to show up better in the end on a darker backdrop, but didn't want to make it completely black. This was a very good middle ground for the final image. This image shown is taken right off the camera, shot in RAW format.
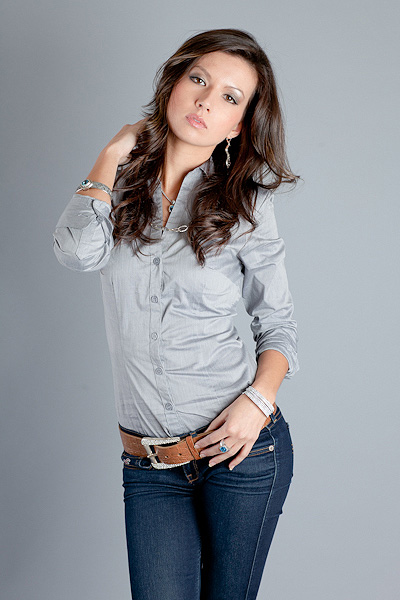
STEP TWO: After taking the image, I loaded it into Adobe Lightroom 3 and made some tweaks to color correct in a tone I wanted to preserve, in this case a little bit of a cooler tone, standard contrast, and sharpened up just a bit. This is always the simplest of the three parts, I spend the least amount of time on these actions.
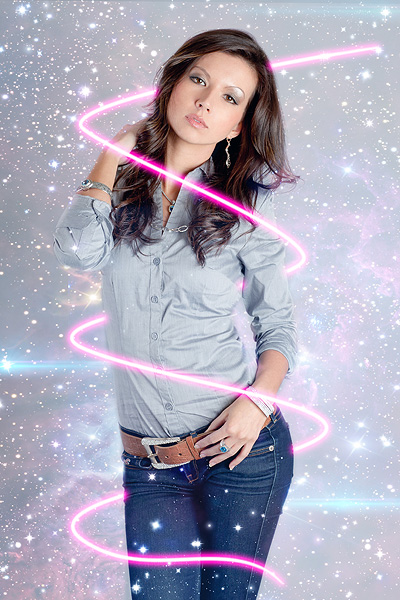
PART THREE: This is when we move the image from Adobe Lightroom 3 to Adobe Photoshop CS5. Exported directly from Lightroom, once opened in Photoshop, I immediately create a duplicate layer of the original "base" or "background" layer. This is just in case a mistake is made after saving the image, I can always go back if needed. So working next on that duplicated layer, I will do any retouching needed. This goes from cloning, cleaning up the hair, or liquifying the subject.
After that, we start to bring in the textures. I have folders to choose from, but again, from the beginning, I always have something in mind in a direction I want to take it with colors, tones, etc.
So we drop over a few layers, simply erase over parts we do not want on that layer, change the opacities, repeat many times as this particular image has about 10 layers with 10 different textures added in.
Now we have a look we are starting to understand. After the layers are in place, I hide them and with using the pen tools and some blending options, we create the laser around her body, then erase unneeded portions to give the wrap-around element. Once that is in place, we unhide the layers, save our image, and let it load back into Lightroom as a new Photoshop file.
STEP FOUR: For the final step, it all comes together. We return our image to Lightroom and start dodging, burning, adding some gradients, fix levels, and do some more color correction tweaks. The best part of moving it back into Lightroom as a new .PSD file is all the levels are reset back to zero, and so even though you have already "color corrected" before moving the image into Photoshop, you will now be able to build over that. This is where we get our final image.
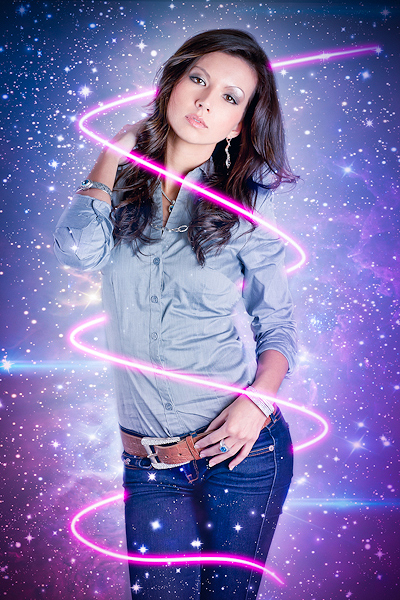
Overall, this image took me about 45 minutes to create as I was running through some trial and error tests with color testing, texture testing, and moving objects around. I said I had a full vision when I began, but as I worked, I wanted to try a few other elements to teach myself in the process. Some of those elements I kept, some I trashed, but with every image I create, I make sure I not only finish it, but also learn something new.
If you have questions, I am going to use this blog post as a discussion. Please feel free to post your comments or questions below, and I will respond here with and details I can give.
Thanks for listening as I rambled on, but hopefully it helped you understand a little bit about my process on textured images.